How Was It Made?
The Story of My Tooth
In the nearly 30-year history of BIONIKA, the time finally came when I needed to replace my own teeth. There was never any question that I would have our own in-house designed implants placed by my dentist. Nearly ten years ago, Dr. Sándor Miskolci — a dental specialist and dento-alveolar oral surgeon — placed 7 BIONIKA Cortical implants to restore my upper jaw. Dr. Miskolci began using BIONIKA implants after my surgery and has been recommending them to his patients ever since. Last year I decided to undergo another implant procedure, this time to replace the posterior molars and premolars (teeth 34–37). Once again, BIONIKA implants were the only option I considered — and specifically a two-phase solution that had not yet been widely adopted, but had been taking shape in my mind for at least fifteen years. We documented the entire restoration process in detail, and can now present the technical aspects below.
In the Role of the Patient
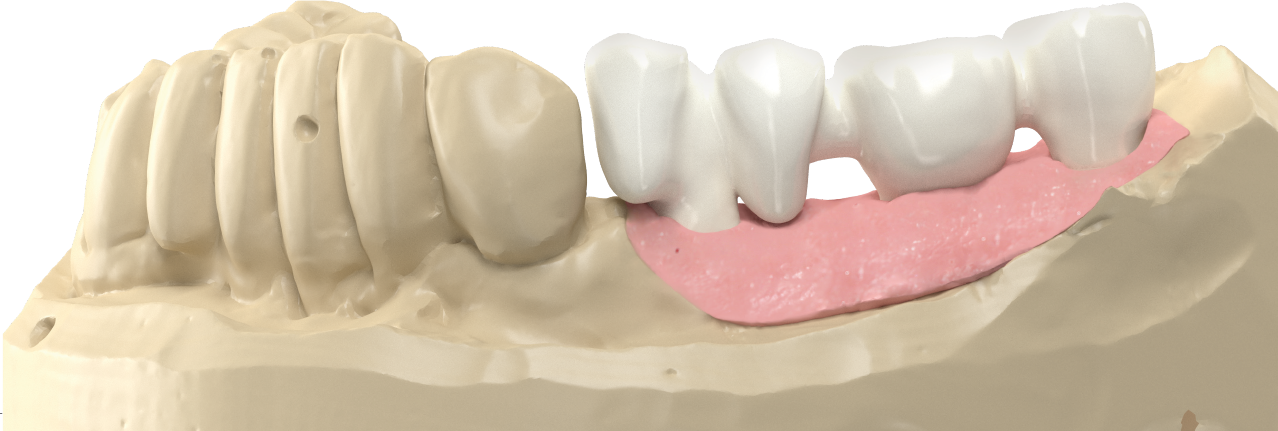
Who wouldn't want the very best for themselves? I feel the same way. This time I took on the role of testing SCANDREA, our own premium implant system. Three implants with a 3.8 mm diameter were placed, onto which a screw-retained four-unit bridge was fabricated. After the healing period, no discomfort or adverse changes were observed — the surgery was an outstanding success, says the satisfied patient. Osseointegration was completed on schedule and without complications.
Following the surgery, we began work on the prosthetic restoration approximately four months later. The plan was to first fabricate a temporary prosthesis from plastic using 3D printing technology, intended for use over a period of several weeks.
The purpose of this was to evaluate the behaviour of a four-unit bridge supported by three implants — not only from an aesthetic standpoint, but also in terms of masticatory function. Studying the response of the soft tissues was also an important consideration. We did use gingival formers for a short period, but due to their circular-symmetric design, they did not provide an adequate soft tissue contour.
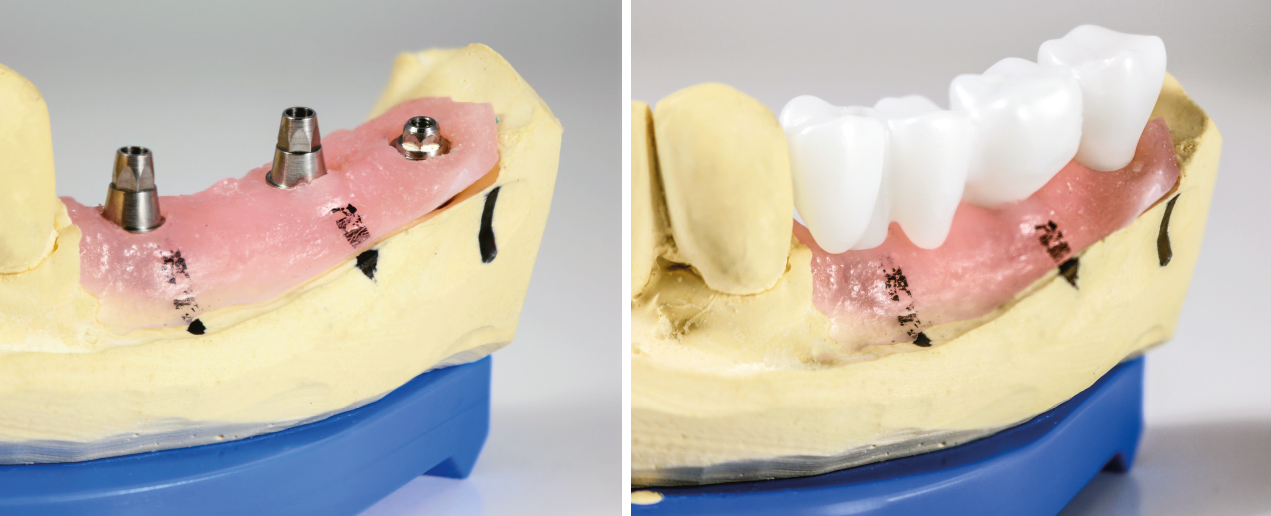
Work could then begin in the BIONIKA laboratory on manufacturing the definitive prosthesis. First, the abutments were selected. SR conical SCANDREA dual-screw Multi-units were placed on teeth 34 and 36, while tooth 37 received a wide-angle SCANDREA conical dual-screw Multi-unit with a 43° angulation and a 2.7 mm platform.
The sulcus depth was 2 mm at position 34, 3 mm at position 36, and 4 mm at position 37. The three-unit framework was first printed in plastic using a 3D printer to verify precise fit. The definitive prosthesis was then milled from zirconia.
Scanning
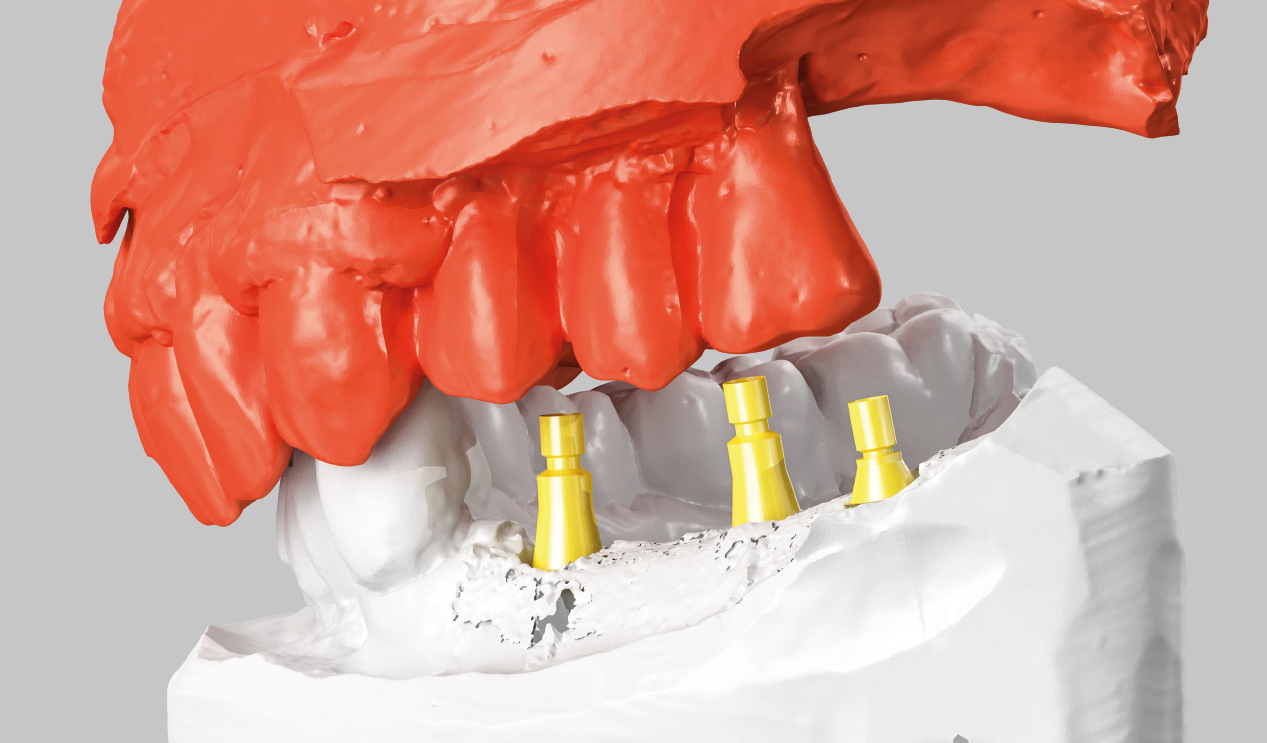
Following impression-taking, a plaster model was produced. The position of the bridge was determined, the model was scanned in occlusion and then in articulation. The exocad software automatically detected and impressively matched the point cloud from the scan.
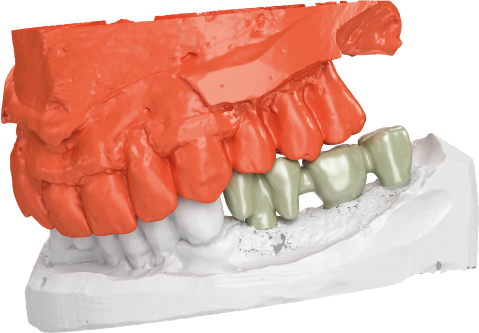
To determine the position of the implants, we used our proprietary non-positioned Scandrea Scanbody, placing the Scanbodies — for the duration of the scan — onto the platforms of two 20° SR conical Scandrea Multi-units and one wide-angle Scandrea Multi-unit with a 43° angulation and a low profile.
Designing the Temporary Prosthesis
After scanning the model, the tooth arrangement was virtually designed and the Monson and Spee curves were configured accordingly.
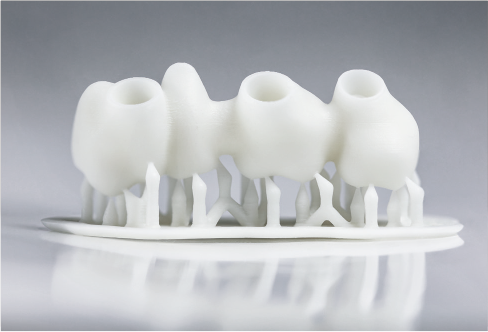
The computer-aided design of the bridge framework could then begin. The design presented a minor challenge for our dental technician, as the most posterior implant was positioned somewhat too far laterally, which required extending the dental arch further outward than usual. After designing the anatomical form, the temporary prosthesis was printed using a 3D plastic printer.
The Dilemma: Zirconia or Co-Cr Cast Framework?
I faced a significant dilemma regarding the material for my definitive prosthesis. I wavered between two options: zirconia and cobalt-chromium, each with its own advantages and disadvantages.
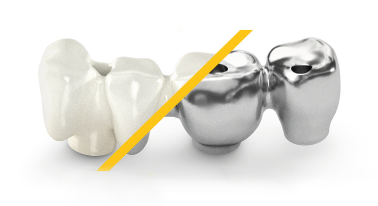
A Co-Cr cast framework yields a softer yet more flexible end result compared to a zirconia framework. Its drawback, however, is that in patients with metal allergies it may trigger allergic reactions, which can cause inflammation in the oral cavity — I have not personally encountered this, but it must always be taken into consideration during treatment planning.
I chose zirconia — not so much for clinical reasons but more for personal ones, as many patients do. This material is considerably harder and more brittle, which means that if the screws are not tightened correctly, it can fracture easily. However, it comes with fewer contraindications and is recommended for long-lasting, aesthetically pleasing restorations. I had previously worn a Co-Cr bridge, so curiosity drove me to experience first-hand what it feels like to have a zirconia bridge as a patient.
Fabricating the Definitive Prosthesis
Using the 3D model designed for the temporary prosthesis, the design was digitally aligned onto the raw zirconia block. The machine automatically generated the CNC milling programme. Our five-axis milling machine then milled the framework from the zirconia block. In this rough state, the retaining pins still had to be cut off and their positions manually finished. The chalk-like framework was immersed in a tooth-coloured liquid and, once fully saturated, was blotted dry. The sintering process followed, during which the material can shrink by up to 20%. When purchasing the zirconia disc, great care must be taken to account for the shrinkage factor and set it precisely, in order to achieve an accurate final framework. Due to our current technical capabilities, the veneering was carried out by one of our partner laboratories rather than in-house.
Abutments Used
To ensure a stable connection with the placed Scandrea implants, two straight SR Scandrea Multi-unit abutment heads and one straight 43° conical Scandrea Multi-unit abutment were used. Originally, I had intended the framework and the abutment to be fixed to the implant with a single pass-through screw; however, the brittle mechanical properties of zirconia had to be taken into account — if the screw is not tightened to the correct torque, the prosthetic framework may crack.
For this reason, my dentist and I opted for the dual-screw solution instead. In this configuration, the abutments were secured to the implants with a standard abutment screw, while the zirconia bridge was fixed to the abutments with a separate, shorter Multi-unit screw. This allowed the abutments to be firmly secured to the implants at 25 Ncm, and the zirconia framework to the abutments at 15 Ncm as a precaution — which is generally sufficient.
With this solution, we aimed to prevent micro-movement between the implant and abutments that could cause soft tissue irritation. Under precisely applied torque, SCANDREA abutments effectively "fuse" with the implant. This represents a major step towards avoiding potential long-term complications. Another key advantage of this system — derived from the precise geometry of the temporary plastic bridge — is that the definitive bridge, once seated on the shaped soft tissue, required no additional abutment changes, soft tissue deformation, or irritation. The patient tolerated this well, despite anticipating some discomfort due to the deeply placed implants.
The Scandrea Implant Family
The SCANDREA implant system covers virtually 100% of clinical cases encountered in practice. It is excellently suited to patients with average bone structure, as well as those presenting with wider but lower or narrower alveolar ridges, ensuring the long-term retention of prosthetic restorations. Beyond this, we are also happy to fulfil requests for custom solutions that fall outside standard production. The implants are manufactured from Grade 4 titanium alloy, and the abutments from Grade 5 titanium alloy, guaranteeing that they will not cause allergic reactions in patients. The retention rate is nearly 100% — according to our data, the likelihood of rejection is less than 1%. The healing phase is characterised by complication-free osseointegration.
SCANDREA implants offer a broad range of clinical applications, providing great freedom for both the patient and the clinician to select the most advantageous restorative solution in any given case. They can be used for single-tooth replacement, for addressing end-of-arch edentulism (as in my own case), or even for the complete elimination of full edentulism. In the latter scenario, a removable prosthesis can be fabricated on as few as 2 implants. Even more recommended is our cost-effective Optimum solution based on 4 implants, or the stable Safe concept with 6 implants, both of which also enable the fabrication of screw-retained prostheses. The implants are available in 6 different diameters with a wide range of lengths; in addition to the standard contour, the "SCANDREA+" enhanced-contour variant is also available. This means there is always an appropriate solution for every situation.
Summary
Through my own dental restoration experience, I was able to appreciate the many advantages of the SCANDREA implant firsthand — and can therefore confidently recommend it to everyone. It has been functioning excellently for nearly a year: my speech and chewing function are back to normal, and aesthetically it is indistinguishable from a natural tooth.
Our product range includes more than 40 different geometries, enabling us to manufacture components for plastic, zirconia, titanium, and Co-Cr based prostheses. Implant heads are available for removable, screw-retained, and cemented prosthetic restorations alike. BIONIKA does not shy away from exceptional cases, and custom abutment design and manufacturing is available upon request.
Designing and manufacturing my own dental restoration was an exciting challenge. Thanks to the wide versatility offered by SCANDREA, I was able to put the solution best suited to my needs into clinical practice.
Article information
- Author | József Hajdú