Solutions Collection
Our new menu section can support your work and enhance your professional reputation. Browse through it, explore the content, ask questions, and search for answers whenever you need a solution! How do others handle it? Rarely is there a straightforward answer, because this knowledge is not in the public domain — it is barely taught, competition is fierce, or we simply cannot think of the solution ourselves.
Highlights from the ever-growing collection:
A loose bridge — a broken screw inside the implant
One of the first abnormal phenomena observed after implantation is movement of the crown fixed to the implant, or, in the case of a multi-unit restoration, movement of the bridge. It moves and moves, and eventually fractures or breaks apart. This is a highly dangerous situation that can, over time, ruin months of the implantologist's work and the patient's long-held expectations — because the screw fixation was not designed for a loosely fitting bridge. The initial micro-movements lead to fatigue fractures, all because the patient lacks sufficient awareness or has fears about visiting the dental practice, and therefore does not present to their clinician before the situation becomes unmanageable.
It is fundamental that we take every opportunity to direct the patient's attention to possible complications. We can always take steps to halt the deterioration, replace the faulty components, and — only as a last resort — restore the jaw to a condition where re-implantation becomes possible.
Patient education as a key element of QUALITY
During the early post-implantation phase, the most essential task is to raise the patient's awareness and provide education on preventing potential complications. I consider it important to emphasise here that a prosthesis manufactured using various medical devices (e.g. implants, abutments, locator components, etc.) through surgical and other treatment procedures — with all its functions (chewing capacity, aesthetics…) — is itself, in effect, also a medical device: a complex, multi-component assembled system that, through the clinician's hands, becomes a finished, aesthetic chewing structure.
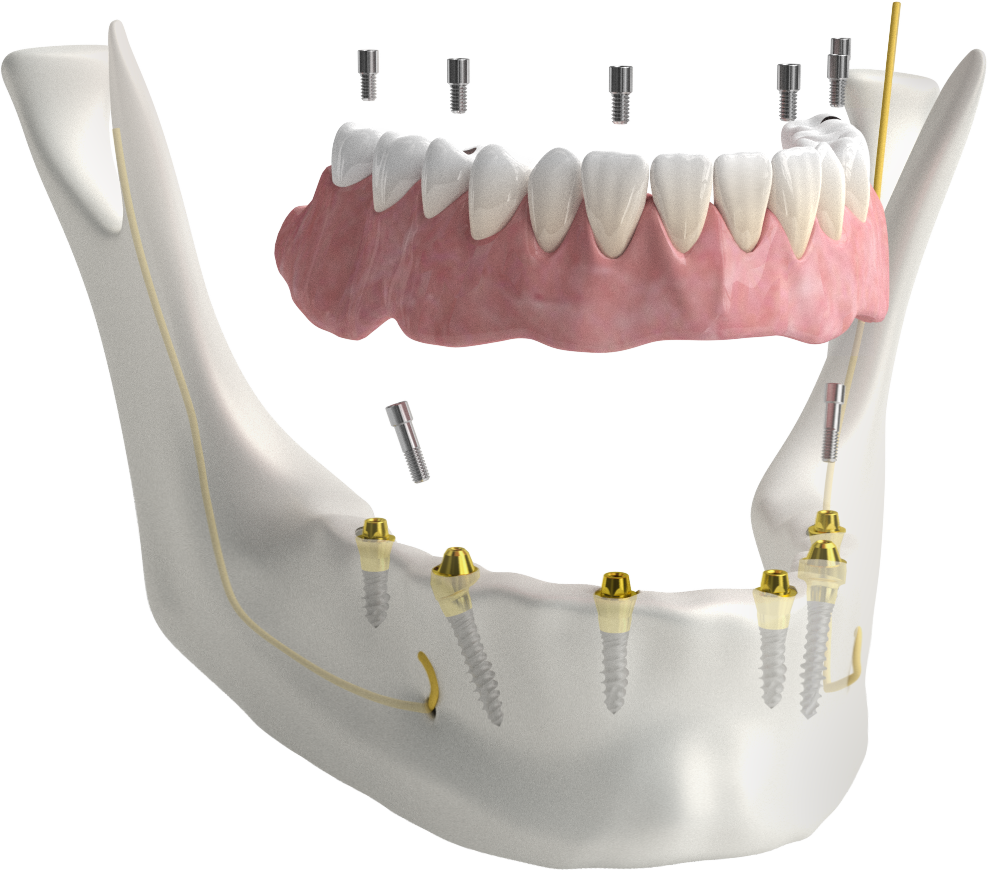
Fig. 1: The complex biological-mechanical structure
The patient's mouth is in effect an assembly workshop where a biological-mechanical structure is created — a complex medical-device product for which its maker, compensated by the agreed price, also bears responsibility (warranty, guarantee). Since the components of a medical device are themselves medical devices, it follows logically that this higher-level biological-mechanical structure — assembled from medical devices and designed to restore biological function — also unambiguously requires the physician to apply the procedures applicable to medical devices when communicating with the BIONIC HUMAN = BIONIC patient, in the form of documented education and an attention-raising certificate, warning about proper use and the prevention of complications.
Does it follow from the above that these tasks must be performed within a quality management system framework? Must we face full compliance with ISO 13485? Many believe not, particularly due to the administrative burden, while others would develop the ISO administration into a serious line of business — a collection of extremely voluminous legal and engineering documents.
Product information — Guidance for patients
If nothing else, at a minimum we must ensure that the patient leaves with documented education, an implant card, and a set of instructions for use in hand. The majority of clinics already do this correctly. It is important that the patient knows at least that they must attend the dental practice for a check-up once a year, and that if they notice any slight movement of the prosthesis (which may be caused by screw loosening), their immediate duty is to contact their clinician to avoid more serious complications.
Clinical cases involving loose prostheses
What can the clinician do in such a situation? Visual inspection, radiographic imaging, and possibly a CT scan are of great help, providing information about the condition of the fixation screw. If this is insufficient, we need to explore the area above the screw head by opening the crown's occlusal sealing layer. Much can be inferred from the exposed screw head, potentially leading directly to a solution. For this, the appropriate instruments must be available — for example, the BIONIKA medical TRAVEL Screwdriver instrument kit, which contains the abutment screw keys for most implant types used in Hungary.
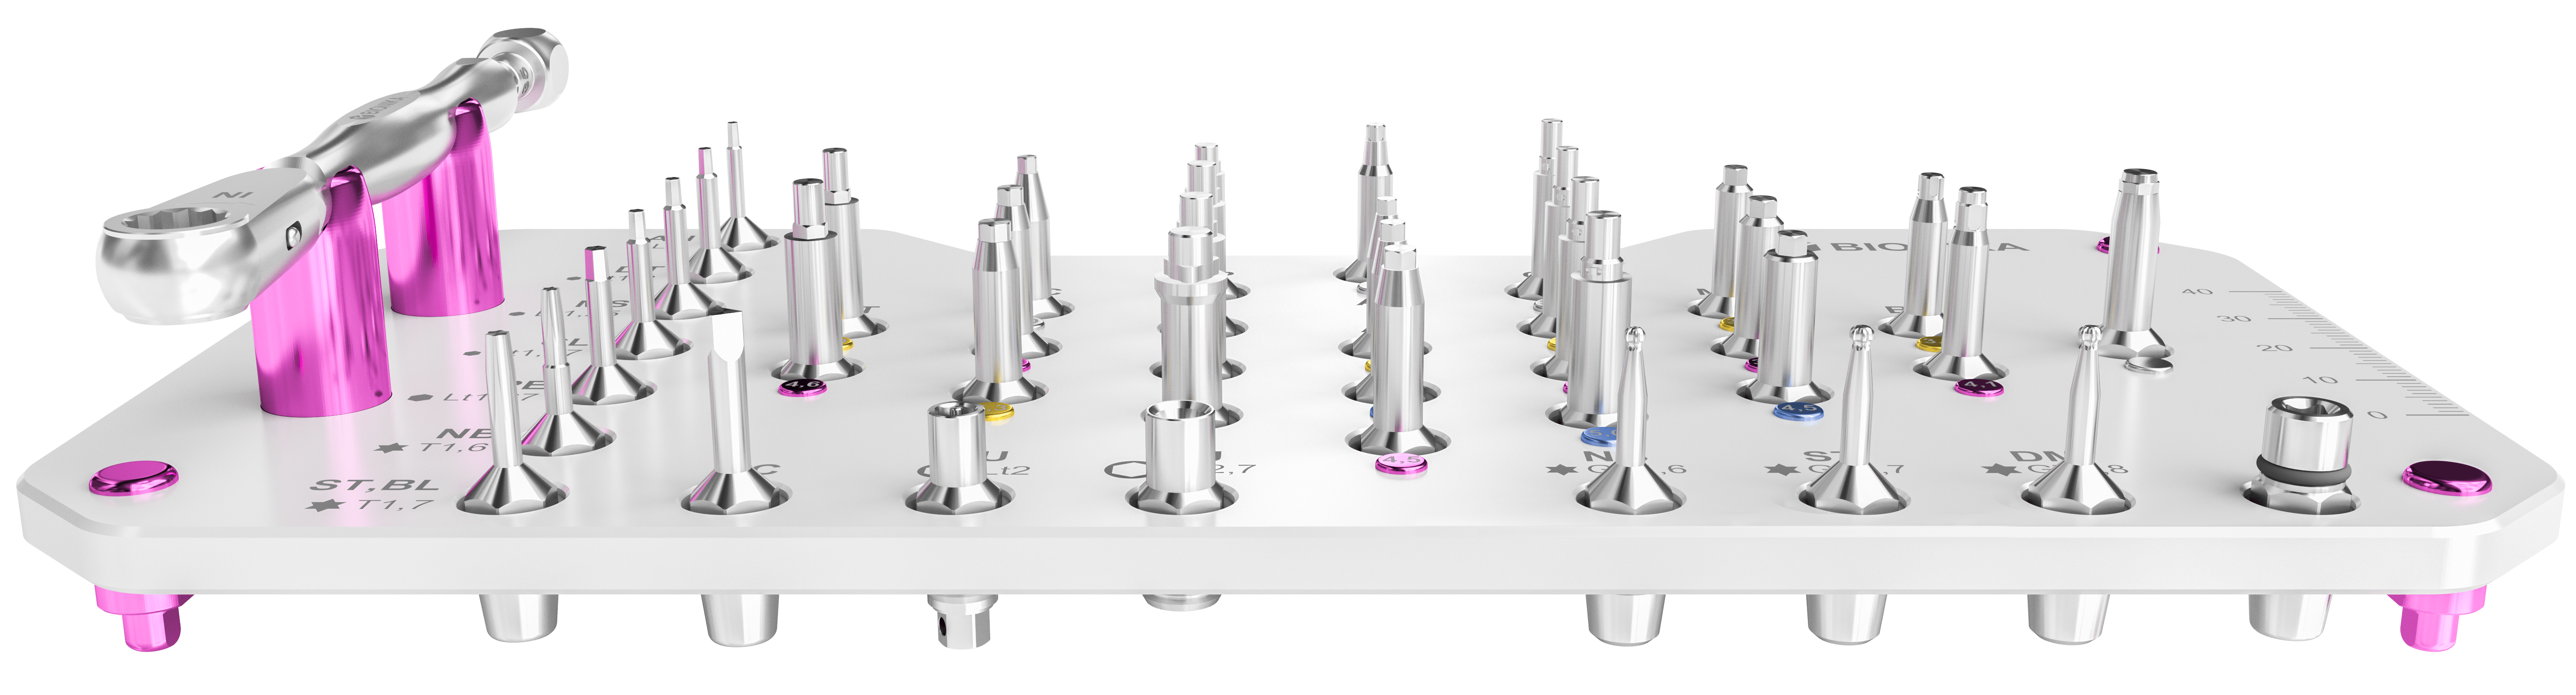
A loosened screw can be re-tightened with the appropriate screwdriver and torque wrench. With minor variation, manufacturers agree on the tightening torques required for screws of different diameters, in order to prevent loosening and fatigue fractures, as well as to avoid the abutment screw shearing due to over-tightening.
- For M1.4 fixation screws: 15 Ncm,
- For M1.6 screws: 20 Ncm,
- For M1.8 screws: 25 Ncm,
- For M2.0 diameter screws: 30 Ncm torque is recommended.
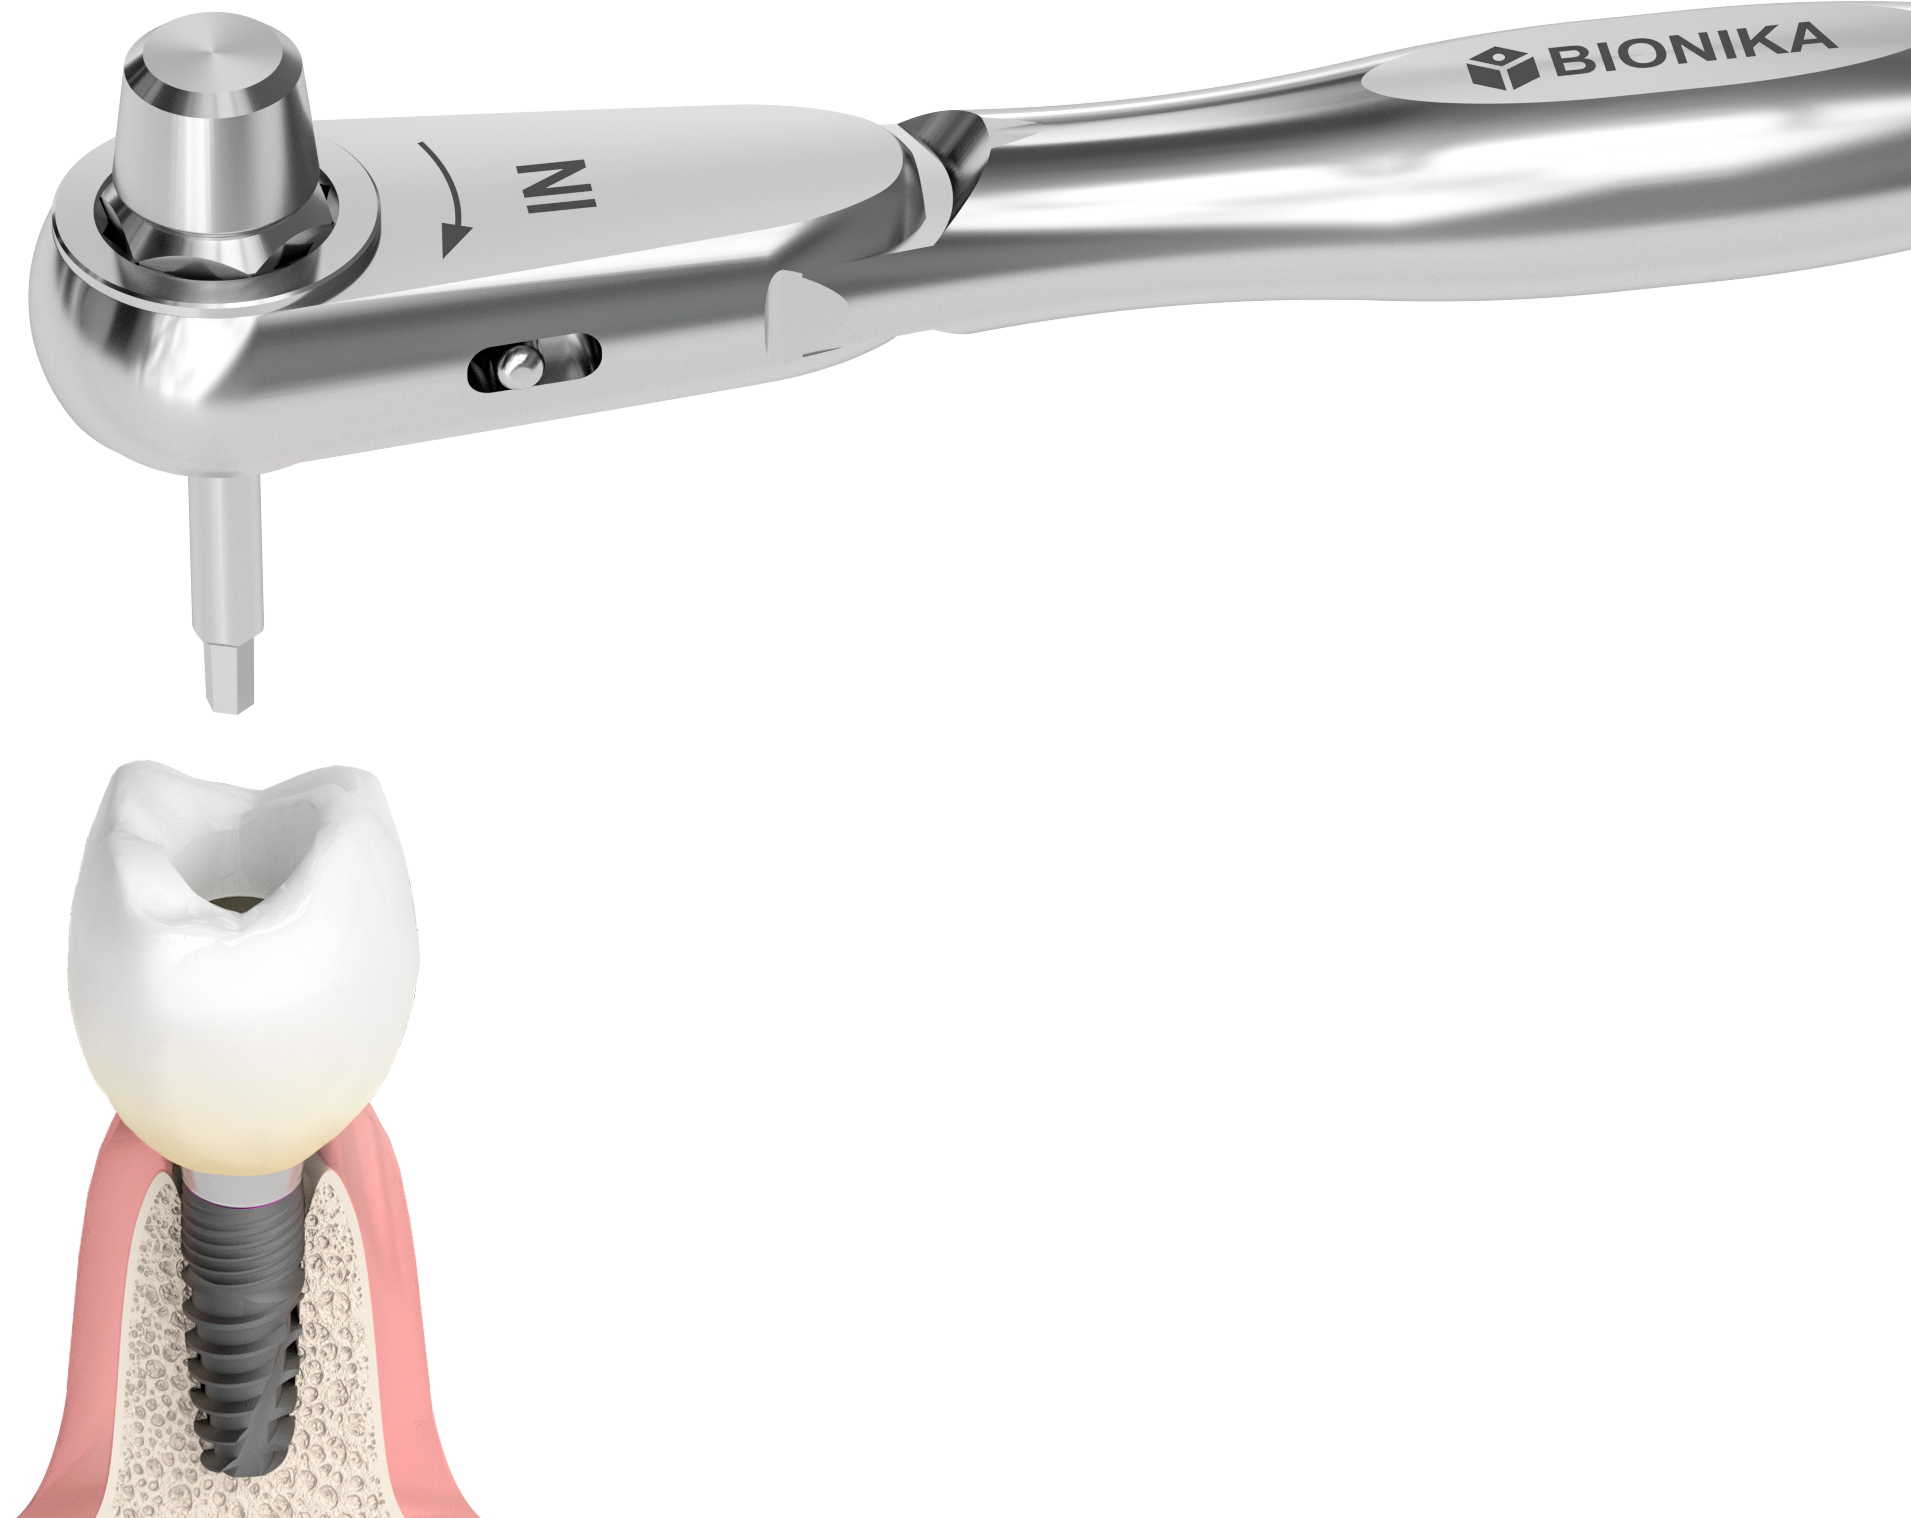
Fig. 2: Using the ratchet torque wrench
In cases of a fractured screw with a single crown, the situation is clear: the patient almost invariably presents holding the tooth in their hand. In the case of a bridge, all fixation points generally need to be released and the situation assessed.
The case of a loose screw connection
In the majority of fracture cases, the threaded section of the abutment screw remains inside the implant, as it cannot unwind on its own. If the fracture was the result of slow fatigue, the fragment lies loosely within the implant thread and can easily be removed using an appropriate screw retrieval kit with a hook tip. This is accomplished by holding the hook-tip retrieval instrument in an elbow piece, applying slow rotation with axial pressure in a counter-clockwise direction. Success is generally achieved. After removing the screw fragment, a new screw is obtained and the single crown or bridge can be properly re-secured.
The BIONIKA Spare Screw Kit can be of great assistance for domestic and international implant systems alike, particularly at high-volume clinics.
The case of a fractured, seized screw fragment
Some screw fractures create a highly critical situation when the threaded fragment fractured precisely because the screw became seized within the internal thread of the implant due to its dimensions and other issues (for example, tightening with excessive torque). In such cases, we must use the left-hand drill bit and drill guide bushing from the BIONIKA Screw Retrieval Kit. Inserted into the implant, it is first rotated slowly and then with greater force in a counter-clockwise direction. Under the considerable stress generated during drilling, the seized screw can be removed with ease.
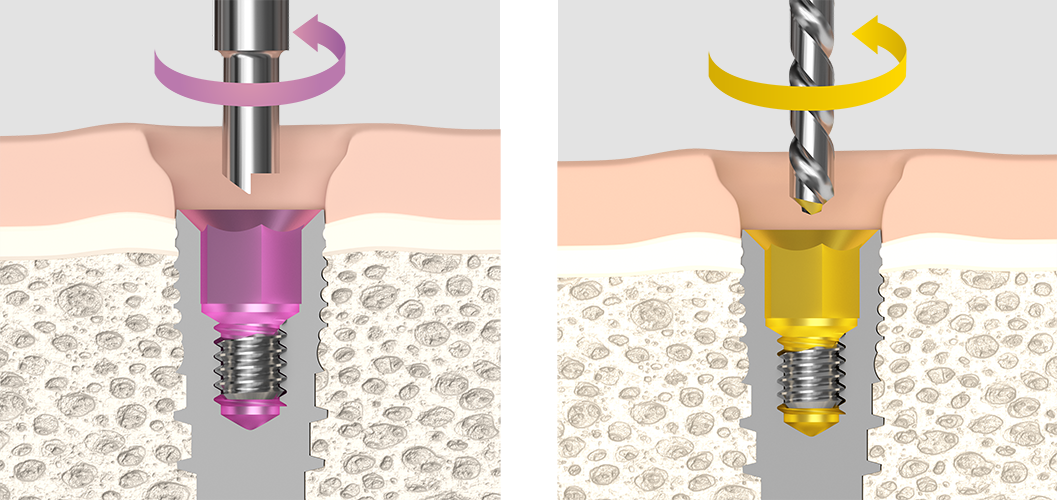
Fig. 3: The hook-tip screw retriever Fig. 4: The screw retrieval drill
Removal of a failed implant
The most critical situation arising from screw loosening due to improper tightening is when the preceding removal methods fail. In such cases, individual creativity is often the most valuable asset. If, following consultation with the patient, a decision is made to remove the implant, we must account for the resulting bone defect and its subsequent augmentation. For removal, several manufacturers recommend a bell-shaped trephine bur with a saw edge. In collaboration with practising clinicians, BIONIKA developed a kit for this purpose which, used alongside the trephine bur, allows the failed implant to be removed in a direction counter to its insertion using a high-torque key — with virtually no bone loss. It is then worth considering immediate replacement with a larger-diameter implant, which can be combined with titanium mesh bone augmentation.
Titanium mesh bone augmentation
BIONIKA has developed numerous instruments for clinicians undertaking bone augmentation procedures, in order to support their success.
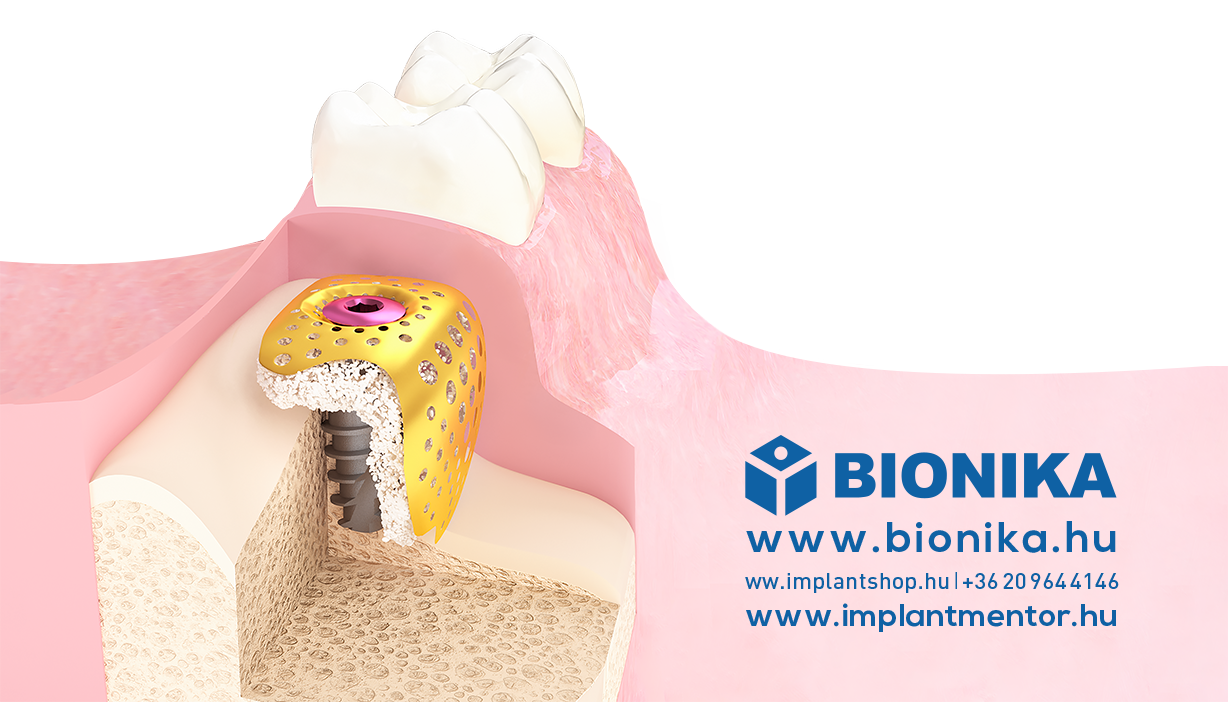
Natural and synthetic bone graft materials require protection during the period of osseointegration. For this purpose, we developed our titanium meshes — so-called membranes — in various sizes and extremely thin gauges: 0.02 mm, 0.1 mm, and 0.2 mm thickness. The perforated, lattice-structured membranes are available in a range of shapes and sizes.
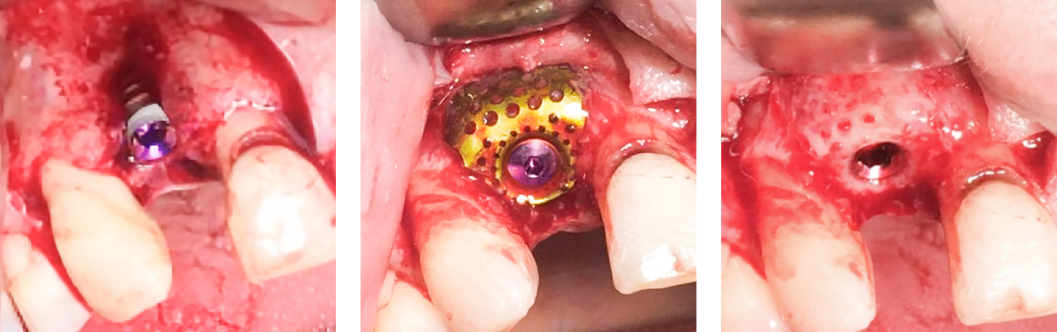
Fig. 5: 3D Builder titanium mesh case images: before bone augmentation, fixed augmentation, and the final result
· Flat meshes can be trimmed to size with surgical scissors.
· Factory pre-cut special shapes are also available.
· Our pre-formed 3D Builder titanium mesh is now also available — pre-bent and contoured into a pocket shape, supplied ready to use, and easily secured with an implant cover screw.
· Flat membranes can be fixed with titanium rivets using a rivet placement instrument.
The 3D Builder titanium mesh was developed to simplify the work of our partners. It is extremely straightforward to use and requires no specialised insertion instruments. The bone augmentation procedure can be performed simultaneously with the implant surgery. According to the current state of medical technology, this is one of the most effective methods for addressing bone deficiencies in the immediate vicinity of implants, and we therefore recommend the BIONIKA 3D Builder titanium mesh to all implantologists.
Summary
The Solutions Collection can also serve as your mentor. It was created with the aim of sharing a compendium of ideas that can assist novice implantologists, while also providing guidance to experienced clinicians for ever-better solutions, so that patient care becomes as effective as possible and we rightly earn the respect of our patients. In this article, I have highlighted several case examples from the field of screw-retained prosthetics.
We invite you to contribute to this valuable collection with your own unselfish participation — your ideas, newly realised concepts, and above all solutions that can be standardised and applied by others.
József Hajdú
Managing Director
MSc Mechanical Engineer, Industrial Engineer,
Healthcare Economist
BIONIKA Medline Kft.
Article information
- Author | József Hajdú
- Date | 2018/04
- URL | www.boon.hu/szupertiszta-fogaszati-implantatumok-miskolcrol/2796950